50 Travel Photography Tips
In my mind I roam the American West and meander along the coast of the Adriatic Sea. I imagine myself at non-descript train depots in Kerala drinking chai with men donning patterned lungis and transport myself to Peru’s Sacred Valley picnicking on yams and grilled cuy. My dreamscapes include vast deserts, forest retreats, even chaotic urban mishegoss. In most of my daydreams, I have a camera by my side.
With COVID-19 far from being under control globally, widespread international travel remains elusive. But for those fortunate enough to be vaccinated and have the financial means, domestic (and even some international) travel options are slowly becoming available. With restrictions beginning to ease, many are starting to consider their next adventure and how to best visually encapsulate the experience.
There are countless action steps that all levels of photographers can engage in before, during, and after a trip that will help cultivate a stronger approach to travel photography. Regardless of your shutter-happy goals, it is my hope that this list of 50 tips will help others avoid common pitfalls that even seasoned travel photographers frequently encounter. More, I hope that the collection inspires you to fully embrace the essence of travel while simultaneously improving your photography craft.
Tuk Tuks (New Delhi, India - 2014)
Before Your Trip
1) Pick the Right Bag - All photography equipment bags are not made equal. Some bags will fit all of your gear but will ruin your body. Similarly, you can purchase the most ergonomic bag on the market but if it can't accommodate your chosen gear, it won't be worth much. Purchase the bag that has space for your camera body, lenses, and gadgets but that feels right with your body. Regarding travel photography, the right bag is just as important as the gear inside it.
Pro Tip: Try not to have “big eyes” when buying a travel photo bag. Having a bulky bag will only entice you to bring along unnecessary equipment and will place stress on your body.
2) Pack the Essentials - Antoine de St Exupery famously exclaimed that those “who would travel happily must travel light." I think of the often-repeated adage while I am packing for any trip. When it comes to packing photo equipment, only pack what you are certain to use.
Get real. Are you actually going to use off-camera flash equipment? How about that 200-400mm you packed just in case you have an encounter with a rare bird? Just because you own a piece of equipment doesn't mean that you have to take it. If you are a photographer who owns a lot of gear, you might have to make a tough decision or two.
Pro Tip: If you have lenses that overlap in focal length, choose the lens that works best for you in most situations. If you have a 24-70 f/2 and a 24-105 f/4, ask yourself which lens gives you the ability to work with diverse scenes and suits your photographic interests. Leave the other/s behind.
3) Double Check - The tendency to double-check isn’t neurotic but smart. Why waste money, and the even more precious commodity of time, replacing or repairing equipment while you are traveling? Double-check to ensure that you have your necessary equipment and that it is in good, working order. You don't want to find out that you have a crack across your lens or a large amount of dust on your sensor when you arrive at your final destination and start shooting.
Yellow Wall (Hai An, Vietnam - 2014)
4) Research the Destination - A little planning goes a long way, especially if you dedicate a large part of your travels to making photographs. Before heading to a new location, spend time researching. What’s there that might pique your visual interest? What has already been photographed to death? Are there particular areas that you should take extra personal care? These are all questions that you should be able to answer before heading off.
Not only should you research logistical information about your upcoming trip, but there could also be photography ethics to consider. Regarding ethics, some destinations need more research than others. If you are interested in portrait photography, for example, Thailand is going to be a much better choice than Oman, where photographing people without explicit permission is an extreme cultural faux pas.
5) Understand Regulations - Perhaps you just got several new pieces of photography equipment. Maybe you picked up a few new lenses or a drone. Depending on your destination, you could be ready for a fun-filled trip. But, some locations have strict regulations regarding the amount of image-making gear that you have packed. An excessive amount of gear can raise a red flag for customs officials, signaling that you are entering a location to work in a professional capacity (which would require a work, not a tourist visa).
6) Find a Fixer - If you are interested in a particular photo project you might want to consider finding a fixer. A fixer is a local professional who will be able to assist you in gaining access to the places and/or people you want to photograph. A bilingual fixer can be a tremendous resource and can open doors that you never thought would be possible.
Yet, there are several points to consider when finding and utilizing a fixer. When communicating with your collaborator, clearly state your objective/s. Ask about other projects they have worked on. Ask sensitive questions to see if your chosen fixer is ethically minded. The last thing you want is someone in your employ who doesn’t align with your personal and photographic ethics.
En Route
7) Carry On - Even if you have luggage locks, it is always best to keep your photography gear nearby. Checking camera gear is always a risk no matter where you are in the world. Hobbyist or professional, all photographers are susceptible to theft (Andy Anderson just had 35K worth of gear stolen on a recent flight). Always keep your photo bag as close to you as possible.
If your trip doesn’t involve air travel, be sure to use a similar approach. Lock your gear in the trunk of your car, hidden from view.
8) Pick the Window Seat - If air travel is part of your journey, pick a window seat. Those that intentionally chose the aisles miss out on sunsets, massive cumulonimbus cloud formations, and the chance to take some stunning aerial shots. Keep your camera close and your eyes on the real onboard entertainment that unfolds outside the plane.
The same advice doesn’t just pertain to air travel. Whether in a bus, train, or car, the journey itself will keep your camera warm and might yield some stunning images.
Cliffside Village (Tigray, Ethiopia - 2020)
Upon Arrival
9) Utilize Safes - If you opened my hotel safe, you would have to dig to find my passport and cash because they would be covered with flashes, triggers, and a lens or two. When I am not utilizing my gear, I like to keep it as guarded as possible. If there is some extra room in your hotel safe, keep your gear securely locked.
10) Talk to the Concierge - While not a proper fixer, the concierge of your hotel (or even an Air BnB host) can prove to be a valuable resource. You will be surprised at how helpful the staff and/or owners can be. Ask if they know about places that tourists don’t often visit. But more, inquire about your accommodation’s neighborhood and get to know your basecamp.
11) Reach Out to Fellow Photographers - Is there a photographer in the area whose work you respect? Reach out and see if they would like to grab a coffee and have a chat. Fellow photographers are, perhaps, the most valuable travel photography resource and might be willing to offer inside knowledge of their home (where to go, when to go, how to go, etc.).
Pro Tip: Always pick up the bill since you are the one asking for a meet-up.
Monastic Sunrise (Ladakh, India - 2017)
Creating Images - Three Big Ideas
12) Tell Stories - Steve McCurry. Robert Frank. Sebastiāo Salgado. Most iconic photographers whose names we recognize made their careers as visual storytellers. Study any accomplished photographer’s work, and, regardless of their subject/s, there is likely a deeper story in every image. The more robust the story (or ways of interpretation), the more lasting impact an image will have.
Telling stories doesn’t always mean being literal and storytelling in photography doesn’t necessarily have to do anything with humans. But the image does have to create a sense of wonderment and allow the viewer to either observe or create a narrative. A powerful visual storyteller will give others the opportunity to dissect visual elements and create their own story with a beginning, middle, and end. Like a good book, photographic storytelling draws the viewer in and makes them personally invested in a scene.
Butter Lamps (McLeod Ganj, India -2006)
13) Create a Sense of Place - Each and every place has its own idiosyncrasies that we interpret and experience in our own ways. One of the central tenants of travel photography is to visually encapsulate a locale of our interpretations so that our audience can be transported, given a sense of what it feels like to be there, with you, seeing and feeling the destination the way you see it.
Saturday Market (Lalibela, Ethiopia - 2020)
14) Decisive Moments - In the early 1950s, Henri Cartier-Bresson proposed a fascinating photographic concept that is still debated today. The “decisive moment” occurs when visual and psychological elements of real-life situations briefly and spontaneously come together. The way these elements coalesce resonates and expresses the essence of a scene. Some believe that the purpose of photography when compared to other visual arts, is to capture these fleeting moments that artistically showcase our world.
Pro Tip: Capturing a single decisive moment may take thousands of attempts. Keep your eyes open and be aware of your surroundings, constantly observing situations as they unfold around you. An afternoon of photographing will not likely result in an image that Cartier-Bresson would exalt.
Mother and Son (Central Vietnam - 2018)
Creating Images - Considerations
15) Warm-Up - The idea of warming up may seem ridiculous. If athletes stretch so that their muscles are prepared for the task ahead, the same should be true for photographers. Photographers need to activate muscle memory so that they can use their cameras seamlessly. More, we need to give our eyes time to begin to see scenes unfolding through a lens. It will take more than a few clicks of the shutter to find your visual current.
16) Be Aware - Awareness, in a general sense, is the capacity to understand what is going on around you. Without a doubt, one of the greatest gifts of photography is allowing yourself to enter a meditative state where the world disappears and you enter the state of “flow.” But In a new environment, it is necessary to be keenly aware in order to protect yourself and others. Even in a state of blissful flow, keep your wits about you.
17) Photograph Architecture - Capturing a destination’s architecture (regardless of scale or condition) will help ground your travel photography and provide viewers context when gawking over a collection of travel images.
Urban Living (Tokyo, Japan - 2019)
18) Photograph Food - Most appreciate a delicious-looking meal or a dish plated to perfection. It isn’t surprising that many are obsessed, even addicted, to photographing their food. Since we can all relate to a love for the edible, photographing food can be a great way to memorialize the meals you have throughout your adventure.
Pro Tip: If simply must photograph meals, ask for a table near a window that will act as a natural-light diffuser. But don’t let your food get cold. Take a couple of snaps, put the camera away, and enjoy the meal.
Chicken Rice (Kuah, Malaysia - 2018)
19) Shoot the Scapes - Some places are so magnificent that they are difficult to translate into an image. Still, landscapes and cityscapes are a great way to elicit awe and inspire others to travel. Scapes show an expanse that leaves the viewer with a sense of magnitude. Whether the swathe of a city, vast forest, or a beautiful sun setting over a beach, scapes can be used to set the scene.
Snowscape (Hokkaido, Japan - 2020)
20) Focus on Details - Details are wonderful additions to image collections. Flip through any contemporary travel magazine and you will notice that stunning panorama landscapes are often accompanied by rich, location-specific details. As you travel, search for pattern, texture, and color palettes that help define a locale.
Window (Addis Ababa, Ethiopia - 2020)
21) Wake Early - When you are traveling and want to make the most of your trip, roll out of bed before sunrise. Take advantage of both the blue hour (just before the sun comes up) and see what is possible at sunrise. This time allows photographers to find quiet solitude, work at a relaxed pace, and have the opportunity to see a destination when most are hours from stirring.
Morning Catch (Central Vietnam - 2018)
22) Shoot Through the Day - Many amateur photographers fall into the trap of only shooting in the morning and the early evening when the “light is right.” Hogwash. The light is always right. It doesn’t matter what time of day you shoot. Opting out of daytime shooting means missing out on a different quality of light, the type that is perfect for exposing for highlights, experimenting with shadow play, and creating silhouettes.
Ice Pullers (Bangkok, Thailand - 2018)
23) Embrace Weather - If you bend your mind, poor weather can be a blessing. Inclimate weather gives the chance to learn how to shoot in alternate conditions and will inevitably lead to new ways of utilizing your camera. With precipitation, humans act differently. Spaces clear out. Reflections are readily available. By embracing rain and snow, photographers have the opportunity to easily imbue mood into their imagery and attempt new techniques.
Snowbrella (Tokyo, 2021)
24) Remember Sunset - After the golden hour (the magical time just before sunset when the sunlight is soft and warm), don’t put your camera away. Sunset and the ensuing blue hour (the hour after the sun has set but there are still traces of natural light) can be the perfect photographic opportunity. For those in love with the natural splendor of color and clouds, there is no better time than sunset. Just don’t forget to put your camera down and see the sunset with your eyes.
Purple Haze (Langkawi, Malaysia - 2018)
25) Shoot a Mini-Project - While not on assignment, many professional photographers work on long-term projects. Some spend years, or even decades, building a portfolio around a certain topic or theme. Just because you only have a week to dedicate to travel doesn’t mean that you can’t adopt the project-based mindset. Pick a theme and keep your eyes peeled. Attempt to create a small body of work to develop during your trip.
Palace Façades (Seoul, South Korea - 2019)
26) Be Patient - Many trips are compressed, allowing only a short amount of time away from home. It’s understandable to want to see and experience as much as possible. But, patience can be a pillar of exceptional travel photography. More, being patient and truly absorbing a location can lead to a deeper perspective, enhancing your overall travel experience even if you never get “the shot.”
Pro Tip: Find a spot or location that interests you and post up. Spend a couple of hours just observing the scene around you. By being patient and becoming still, your eyes have the chance to adjust and will readily notice changes in the environment.
Crossing (Hanoi, Vietnam - 2014)
27) Wander - When guests come over, most make some sort of effort to clean up our homes. The same goes for destinations that rely on tourism. Major tourist attractions are presented in a way to impress travelers, psychologically leading them to assume that the rest of the location (i.e. neighborhood, city, country) is similar. Like our homes, the real story is often piled up in the closet.
We travel to experience. Wandering off of the tourist trail with your camera in hand is one of the best ways to have an authentic experience. Recommendations from Facebook groups, guidebooks, and blogs are only going to take you so far. While these resources are handy, they are generally regurgitations of each other, travel-based echo chambers.
Since wonder and wandering go hand in hand, perhaps you are ready to stray from the usual itinerary. It should go without saying that you should always be aware of your environment and strongly rely on intuition. Safety is paramount. But your trip and images will be greatly enhanced by intentionally getting lost, photographing the overlooked nooks and crannies that are often more accurate representations of a locale.
Backstreets (Seoul, South Korea - 2019)
A Variety of Techniques
28) Focus on Light - If you ask professional photographers’ advice on how to improve your craft, many will mention an understanding of light. To start, seek out light, not subjects, and photograph the way it plays and changes in different scenarios.
(Tokyo, Japan - 2019)
29) Blur It Out - To the untrained eye, a blurred image is a sign of an inexperienced photographer. Yet, intentionally blurring an image can add both drama and mystery to an image. After you have found a subject or composition that intrigues you, manually blur the focus of the image. Experiment. There is no right or wrong way to blur an image for artistic expression.
Pro Tip: A fun way to blur an image is to slightly reduce your shutter speed and quickly “tug” your camera away from your subject at the end of the exposure.
Kyoto, Japan (2019)
30) Blow It Out - Professional photographers pretentiously harp on images that are “blown out” (meaning that the photo is over-exposed). But, embracing highlights and overexposing an image can be an artistic choice. Don’t fall into technical traps. Instead, lean into the artist within and express yourself the way you choose.
Taketomi, Japan (2021)
31) Long Exposures - Photographers use long exposures for a variety of reasons. Long-exposure (time-exposure or slow-shutter) photography involves using reduced shutter speed. For those familiar with manual camera modes, using a slow shutter speed will sharply capture stationary elements while blurring, smearing, or obscuring any moving elements. Similar to intentional blurring, long exposures can add artistic flair to your travel photography.
Pro Tip: Experiment with different shutter speeds (i.e. 1/30, 1/8, 1/2 of a second), and, depending on your desired effect, consider using a tripod to minimize camera shake.
Sukhumvit Zoom (Bangkok, Thailand - 2020)
32) Explore Multiple Perspectives - Most travelers simply take a snapshot of a subject and move on. But there are times when you will be drawn to a scene or space. When this happens, take the time to photograph from multiple perspectives. Get close. Step back. Get low or go high. By working a scene from a variety of perspectives, you will able to have the option of showcasing your subject from the vantage point that best represents your vision.
The Pond (Shirakawago, Japan - 2019)
33) Search for the Abstract - Not everything in travel photography has to be literal. The purpose of travel photography is to capture a sense of place (see Tip #13). With this said, a sense of place can be established with abstraction. Look for interesting compositions that include glimpses of a destination which will, in turn, place the onus of interpretation onto the viewer.
Paddle Boards (Lake Tahoe, California - 2018)
34) Utilize Layers - One way to draw focus to your intended subject is to use layers. Foreground and/or midground layers are a way to highlight your subject and add depth to your images. Whether trees, windows, or other humans, frames can be found almost everywhere can be used as layers. Be willing to play with a variety of compositions and “work the scene” until you find just the right layer that fits your vision.
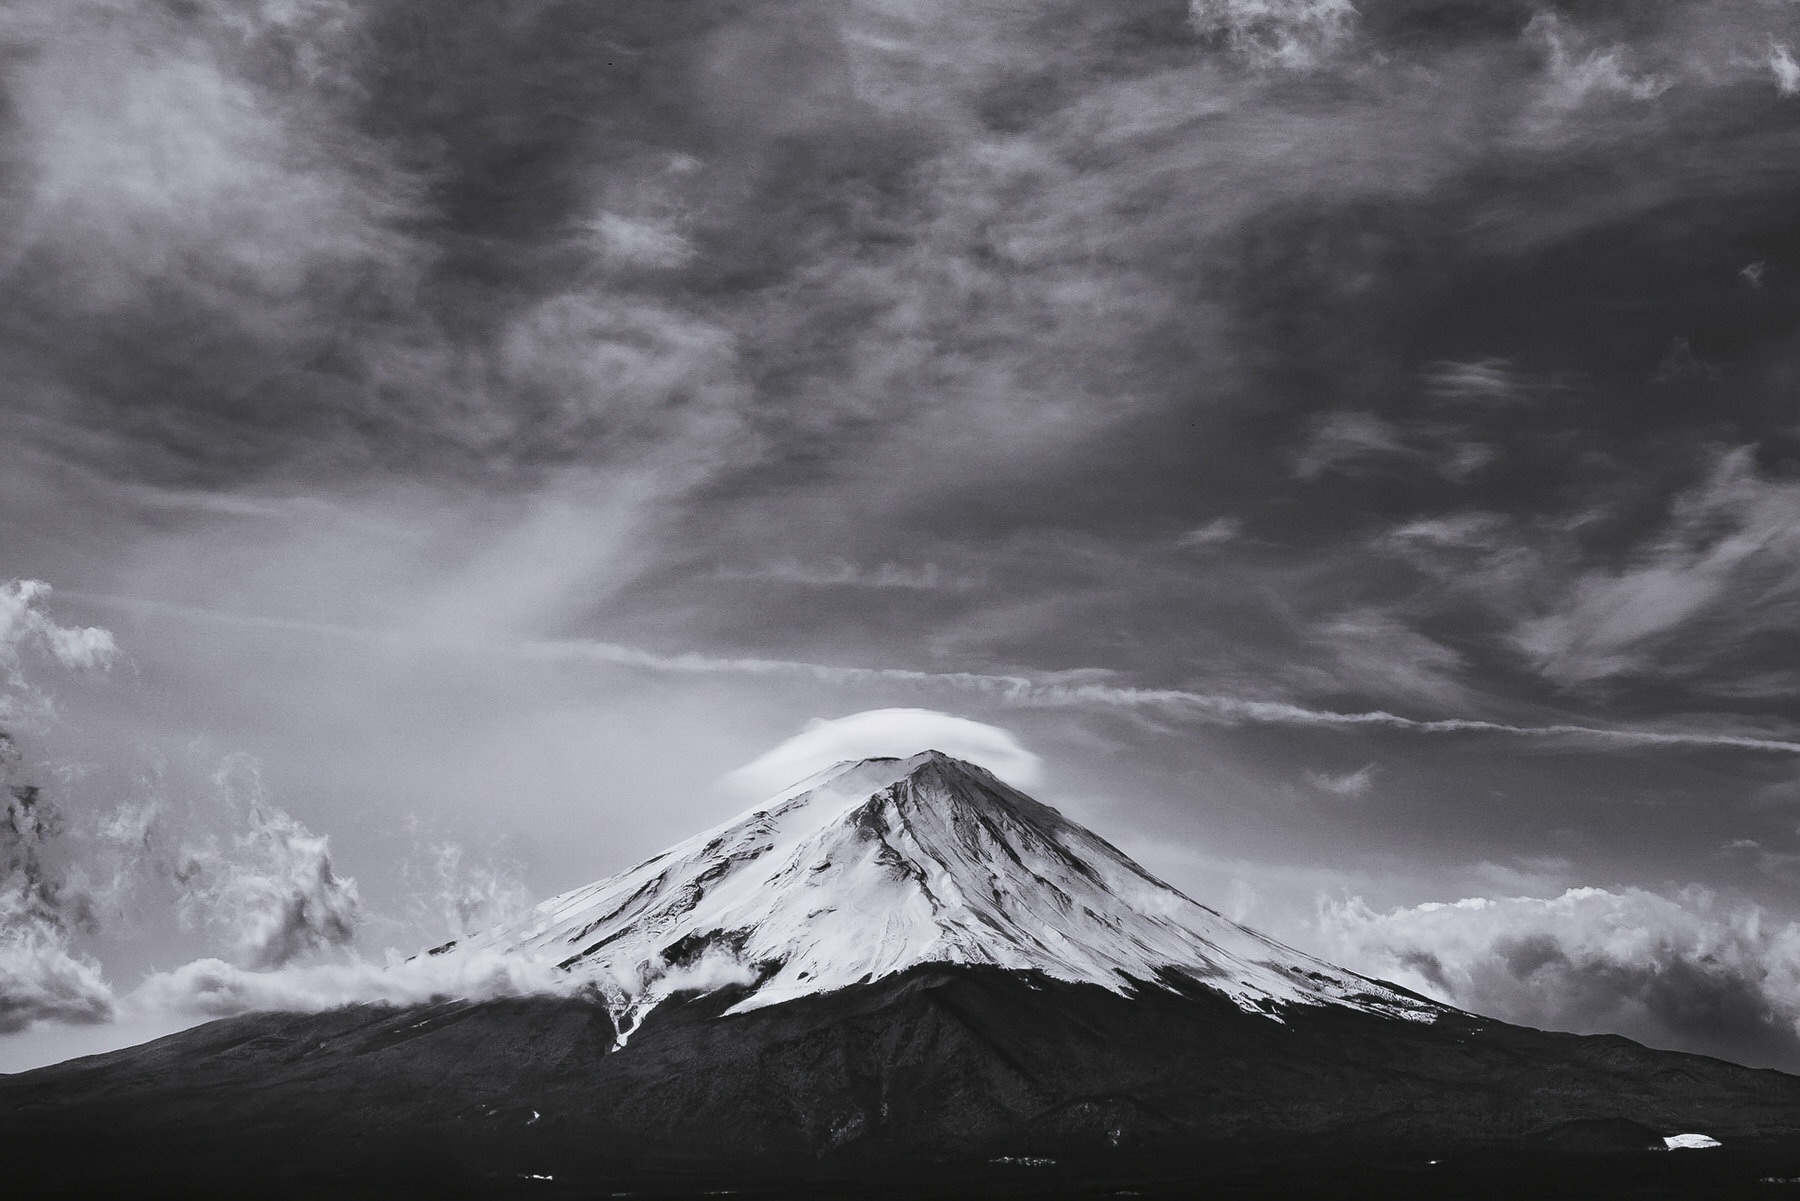
Mount Fuji (Yamanashi Prefecture, Japan - 2020)
35) Use Negative Space - Negative space is the area surrounding the main subject in a photograph that is left unoccupied. Put simply, it is the space around the object itself that helps define the positive space (main focus) and rapidly draws a viewer’s attention to the photograph’s main feature. Powerful photographs tend to eliminate distractions. Utilizing vast areas of space to highlight your subject will enhance the impact of the image.
Bridge (Thimpu, Bhutan - 2018)
36) Get High - If you have the desire to see your surroundings from a different vantage point, you may want to consider aerial photography. To get a bird’s eye view, explore the sky with a drone. Learning to use a drone is a great way to break out a creative rut you might be experiencing on the ground. Since drone technology isn’t new, there are a plethora of drones on the market to suit a range of budgets.
Pro Tip: Before your trip, get to know your drone and practice, practice, practice. More, understand the laws and restrictions in any area you wish to fly in. Some countries have strict drone policies and will confiscate your UAV upon landing while other countries, like Thailand and now Canada, charge hefty fines charge for flying without the necessary paperwork/applications.
Kondoi Beach (Okinawa Prefecture - 2021)
On Portraiture
37) Be Respectful - Every photographer must formulate their own ethics. Considering portraiture, being respectful is my first and foremost concern. Unless I am shooting a candid scene, I typically ask for permission before making a portrait. If permission is granted, I take a few photographs (each a bit different in crop or angle) and then put my camera down. To me, it is much more important to be respectful of my subject than to offend others by overshooting.
Lady (Hoi An, Vietnam - 2017)
38) Say Hello- Many amateur photographers are intimidated by introducing themselves to strangers. Unless you are a photographer who only wants to capture candid scenes, it is always a good idea to introduce yourself to any subject you want to photograph. Language barriers shouldn’t affect your introduction as you can use body language, a gentle smile, and an open mind. After a polite introduction, most subjects will generally reciprocate your kindness.
39) Candid Moments - Candid moments can express the essence of humanity. While I usually ask for permission to make someone’s portrait, I also place great importance on capturing humanity as it is, in the raw. The key to capturing candid moments is to be an active observer of the world around you. Decisive moments (see Tip #14) can be seen everywhere as long as your eyes are up, watching real life unfold.
Pilgrim In Trance (Lalibela, Ethiopia - 2020)
40) Stay a While - For me, travel is more than just sightseeing, food, adventure, and photography. I also travel to learn about and empathize with others. In turn, this aspect of travel helps me learn about myself. Instead of taking someone’s photo and moving along, stay awhile. Have a chat (even if you have to use universal body language and facial expressions). Get comfortable just being in a stranger’s presence. While the experience might take you out of your comfort zone, I assure you that the time you spend with others will be on the list of your most memorable travel experiences.
Mohammed (Kashmir, India - 2017)
41) Give More Than You Take - I love Ishmael, a novel by Daniel Quinn that examines the hidden cultural biases driving modern civilization and explores a range of ethical considerations. For some reason, I think about this book a lot when I am making photographs anywhere in the world.
I feel in debt to anyone who is willing to allow me to make their image. I want to offer something in return. A coffee. A flower. A hug. Something. There is an intimate relationship formed between a photographer and any person vulnerable enough to step in front of their lens. The question is, what can we bring to the table? How can we humbly show our gratitude?
Pro Tip: Sometimes sharing photos can be the best offering you can give. If you have the opportunity, pack a Fuji Instax camera and offer instant portraits to those you meet along the way even if you don’t take a photo for yourself (as it is indeed better to give than to receive).
Siblings (Tigray Region, Ethiopia - 2020)
Upon Return
42) Back-Up Images - One of the biggest mistakes a photographer can make is not backing up their images. As soon as you return from your trip, import your images from memory cards onto your computer. But don’t stop there. It is always prudent to keep several copies of your images utilizing a variety of means (i.e. external hard drives, cloud-based services, etc.). Personally, I make three copies of my images before I erase my memory cards (two copies on different hard drives and a copy in the cloud).
Technology fails. While most drives can have the contents extracted (at a large expense), in some cases, the data is completely lost. Rest easy by backing up your backup.
Pro Tip: Never erase the data from your memory card/s until you are certain that your images are backed up in multiple locations. Double-check. Triple-check. Then delete.
43) Cull With Intention - Not every image we make is worth keeping. In fact, the opposite is true. Most photographs just aren’t that good. At some point, all photographers must learn to look at their images objectively and ruthlessly cull their collections. If you have worked a scene (taken a variety of images of a single subject), do your best to select the single image that best represents the subject. As a travel photographer, your hope is to present a location with intention. When it comes to culling, quality over quantity should be valued.
Processing photos in a grid view will help you select “the keeper” from a similar series of images.
44) Process Photos - If you chose to shoot your images in JPEG, you won’t have too much editing to do. But, if you shoot in RAW format, you will have your work cut out for you. Depending on your objective, you might only want to showcase a single image from your trip. You may have the hope of publishing an essay or travel story. If the latter is the case, try to keep your processing consistent in order to have a visually cohesive collection of images.
45) Share Photos - Family and friends are, of course, interested in your trip. If you feel inclined to share images of your recent adventure, select a variety of shots. Remember, you are more invested in your own travels than others will be. While your core group will want to see the highlights of your trip, they likely won’t want to relive every waking second of it. Only share the cream of the crop. 15-20 photographs will give your audience a taste of your trip and leave them wanting more.
46) Use Images in a Variety of Ways- Every professional photographer squeezes every last drop of juice from their content. If you have shared your photos on social media, why not use the same collection to write a blog post about your journey or create postcards to send to friends using a featured image from your travels?
Japanese Mid Century Modern (Digital Composite - 2021)
Another way to bring your images to life is to print them. Images deserve to be touched. When was the last time you actually held a photograph that you took? One way to remember your trip, share your work, and engage in the physical aspect of photography is to let your images exist in a medium other than pixels. You might even be able to sell your prints (have a look at my print store).
47) Submit - There are many digital and/or print publications that might be interested in your imagery. Keep in mind that there are thousands of photographers also submitting content to publications every day. Rejection is a natural part of the process. Don’t let rejection emails or lack of response discourage you. In the end, photos should be made for the love of the craft, not for the trivial accolade of being a “published photographer.”
Pro Tip: To maximize the chances of a photo editor considering your work, be sure to follow the submission guidelines (likely listed on a publication’s website under tabs such as “submit” or “work with us”).
48) Request Critique - I frequently have difficulty disconnecting the joy of making an image from the final result. As photographers, we easily become emotionally tied to image-producing experiences. Seeking objective opinions from trusted colleagues is, at times, a great idea. For years, Seoul-based photographer Dylan Goldby and I have welcomed constructive criticism from one another in order to develop the capacity to review our own work more objectively.
Pro Tip: Choose your “critique tribe” carefully. Listen intently, openly, and reflectively to the constructive criticism you receive from your trusted colleagues. But in the end, remember it is your work, your art.
49) Update Your Portfolio - Returning home with a handful of stunning images can be the perfect time to refresh your travel photography portfolio. Before spending the time uploading and reformatting your digital portfolio, cull your new images with an editor’s eye. Ask yourself what your portfolio is lacking. If any of your new imagery boosts the quality of your overall portfolio, incorporate it.
50) Reflect - Travel writer Pico Iyer made a connection between love and travel. In The Art of Stillness he wrote, “if travel is like love, it is, in the end, mostly because it’s a heightened state of awareness, in which we are mindful, receptive, in dimmed by familiarity and ready to be transformed. That is why the best trips, like the best love affairs, never really end.” I agree with Iyer. Our adventures continue well after we return home.
After a journey, take the time to reflect on your trip. What did you learn about others, yourself, our world? Reflect on your images. What do they tell you about what you are visually drawn to, your fears, your passions?
Travelling has the power to facilitate positive change within us and, hopefully, transforms us into more empathetic humans. Having a camera along to help document the process is just an added luxury for those who are fortunate enough to see the world.
In Conclusion
I am in debt to many photographers who have taught me the tricks of the trade. But on the whole, I have had to learn most travel photography lessons the hard way. From broken equipment, memory card loss, theft attempts, and cultural blunders, I have made countless mistakes throughout the years. Mistakes are part of the learning process and are just as valuable, if not more so than successes. With this said, I wish you many mistakes but also hope that some of the ideas presented here will ease frustrations and help others improve their travel photography craft.
Do you have more tips for travel photography? If so, I would love to hear from you. Leave a comment on this post or drop me a message on Instagram. Safe travels, stay healthy, and happy shooting!
More Travel Photography
Tokyo Photo Journal #8
A Decade Later | Documentary Photographer
The end of a forested path led me to an overlook. Perched above the jagged rock formations and rugged coastline, I looked out at the sea. The water lapped gently. A mid-sized vessel returned to Ryouri bay from a day of fishing. In the distance, I could see the town of Ofunato. The combination of the breeze and the gnarled trees jutting out from the cliffs gave me a sense of calm. I could feel an idyllic Japan that I love so dearly.
But a decade ago, those who call this region home experienced the antithesis of tranquility and continue to suffer from the events of March 11, 2011.
The Earthquake
A Friday.
2:46 p.m.
A magnitude 9.1 megathrust earthquake violently jolted the seafloor 70 kilometers east of Tohoku’s Oshika Peninsula. Referred to as the Great East Japan Earthquake, it was the most powerful earthquake ever recorded in the island nation - the fourth most powerful worldwide. The ferocity of the quake moved Honshu (Japan’s main island) 2.4 m (8 ft) east, shifted the earth on its axis (between 10 cm and 25 cm), and increased our planet’s rotational speed by 1.8 µs per day.
The great quake and subsequent aftershocks terrorized Japan. While the epicenter was 373 km (231 miles) northeast of Tokyo, the nation’s capital experienced shocks powerful enough to rip open the ground. The event so monstrous, tremors were felt as far away as Kaohsiung, Taiwan, and Beijing, China.
The physical and emotional impact of the earthquake was substantial. Yet, within hours, Japan found that the earthquake itself would only be the catalyst for a string of unimaginable, catastrophic events.
The exterior of Okawa Elementary School (Ishinomaki, Japan).
The Tsunami & Okawa Elementary School
As feared, the quake triggered an unparalleled tsunami that raced west towards Japan at up to 700 km/h (435 mph). At their peak, the tidal waves towered 40.5 m (133 ft) and had enough stamina to barrel 9.6 km (6 miles) inland.
One story that encapsulates the horror of Japan’s 2011 tsunami is that of Okawa Elementary, a primary school in Ishinomaki. While the tidal waves hammered Ishinomaki’s coast, another natural phenomenon happened in the city’s northeast. There the danger was the Kitakami River, an estuary where tidal waves managed to push up-river.
Three minutes after the earthquake, students and teachers evacuated Okawa’s classrooms and began to gather in the schoolyard. While exiting the buildings, some teachers told their pupils to immediately move to high ground. Several children started to make their way up the hillside directly behind the school - a steep embankment where Okawa students planted Japanese ash trees, cultivated shiitake mushrooms, and explored the forest. Yet, the decision was made to have those children return to the schoolyard and gather with the rest of their classmates.
Six minutes later a major tsunami warning was issued urgently requesting all to move higher, away from the banks of any river. Still, students and teachers remained in Okawa’s yard. A second warning was announced by a municipal vehicle passing by. 39 minutes after leaving their classrooms, the children remained in place, seemingly frozen.
Prior to the quake, the Miyagi prefectural authorities repeatedly directed schools to review their disaster procedures. Okawa Elementary School had created a tsunami plan but failed to include the most crucial components - a specified evacuation destination. Without a concrete directive, the 11 teachers continued to discuss a plan of action.
Several of the 77 children pleaded to move further uphill. Meanwhile, the tsunami surged through the Kitakami, enveloping houses, cars, and tens of thousands of trees. Debris was caught on major bridges (a fourth of which would eventually collapse) and the tsunami’s path was temporarily blocked. But the debris only served as a dam and allowed the tsunami to build strength and height.
At 3:36 the group finally began to leave Okawa’s grounds, but not up the hillside just meters behind the school. Instead, they moved towards the river to a zone that would have a gradual increase in elevation. At this point, the route or evacuation destination was moot.
A minute after the students and teachers began to flee, the mighty Kitakami burst its banks. Within seconds, the 8.6 m (28 ft) torrent reached the school. At 3:37, 51 minutes after the great earthquake, all clocks at Okawa Elementary School stopped. 70 children and 10 teachers were dead. Four children were never found.
Okawa Elementary School classroom.
Rows of memorial trees are planted outside Okawa Elementary School.
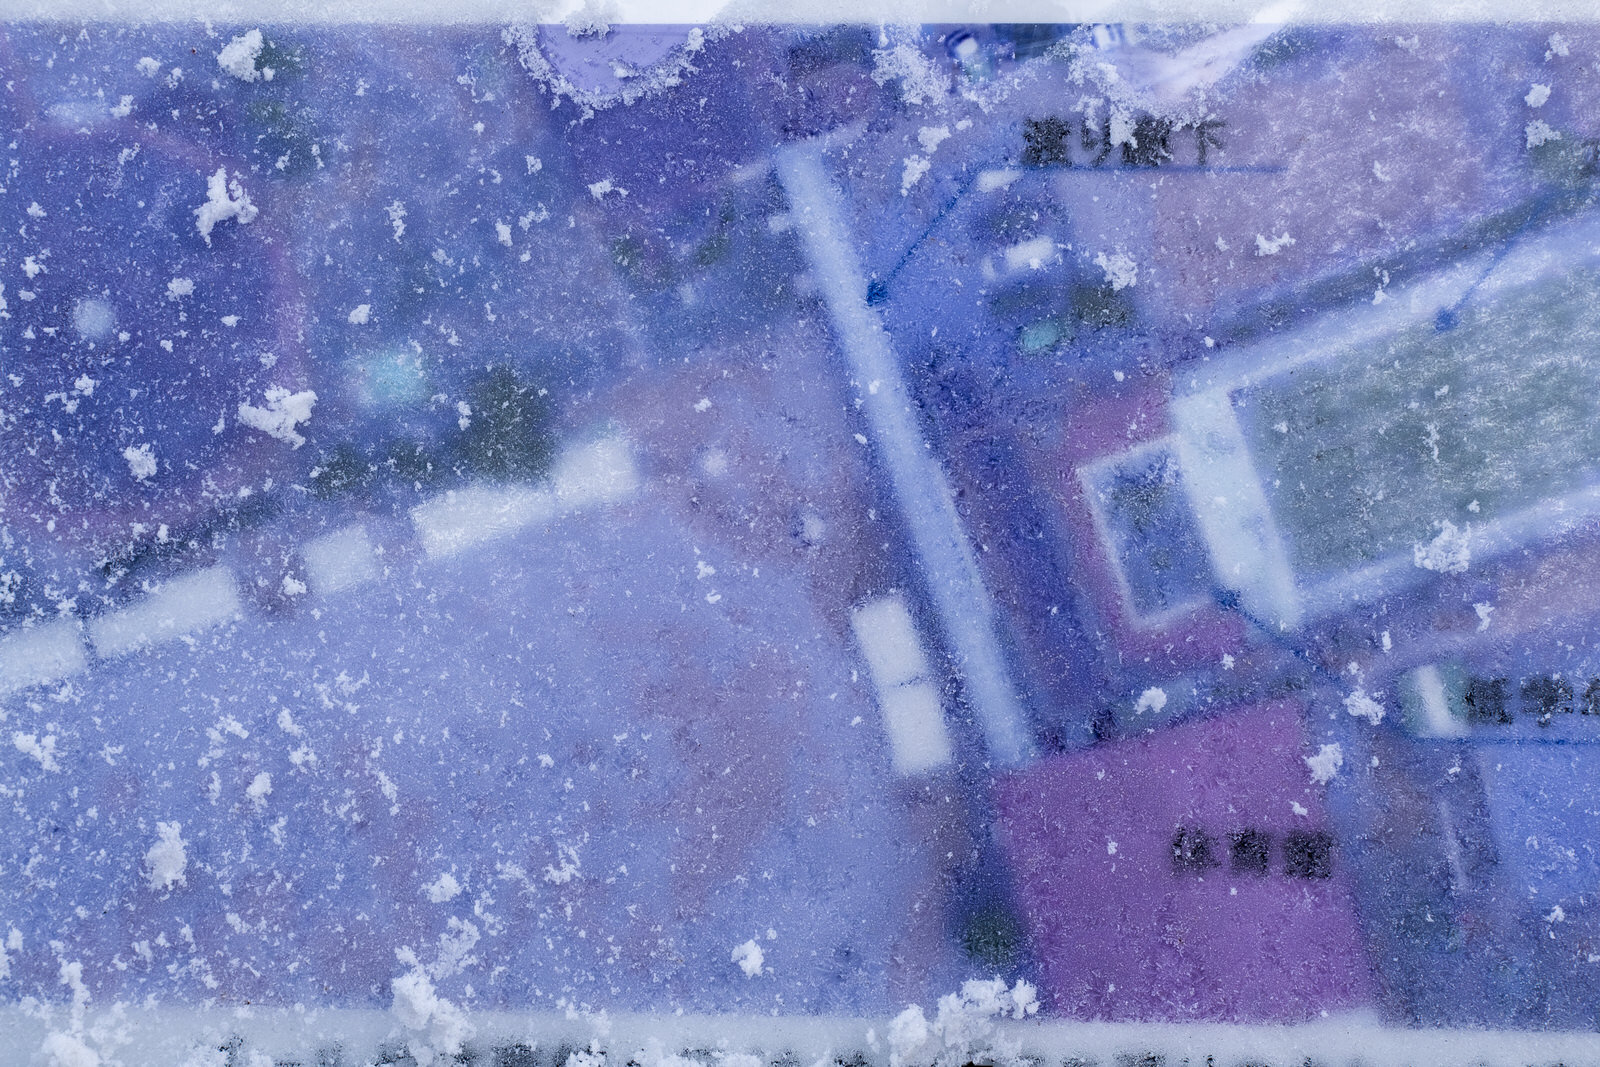
An aerial image of Okawa Elementary covered in frost.
The Fukushima Daiichi Meltdown & Futaba, Japan
An hour after the quake, tsunami waves also pounded the Fukushima Daiichi Nuclear Power Plant complex. The force caused a loss of electrical power, halted cooling systems, and triggered immense heat to build. Without working cooling systems or ventilation, hydrogen gas accumulated within the reactors. A nuclear meltdown was imminent.
The Japanese government declared a “state of nuclear emergency.” Fearing fallout, the evacuation of all residents within a 10 km radius was requested. Included in the evacuation were the 6,830 residents of Futaba, Japan. Leaving their homes as they were, residents fled with few personal belongings and headed to designated shelters. Soon, there were level-7 meltdowns (the highest, most deadly rating on the INES scale) in three of Fukushima Daiichi’s reactors.
Now, the town of Futaba is the only municipality near the inactive Fukushima Daiichi Nuclear Power Station where residents are forbidden to return. It’s uninhabitable. The people of Futaba remain scattered across Japan, unable to reconstruct or reenvision a life in their homes.
Most parts of Futaba are contaminated and are officially marked as “difficult to enter”. Today, only 2% of the urban area is open to visitors or previous residents of the town. Vegetation has overtaken many homes and vines seem to act as a scaffolding holding some of the aging structures together. Wild animals such as boar can be seen roaming the streets. Radioactive particulates dust the interior of homes and stores. Futaba is, and will remain, a ghost town.
Abandoned home (Futaba, Japan)
Gear left in the fire department garage.
Some or the 10.4 million bags of radioactive topsoil stacked throughout the nuclear exclusion zone.
Abandoned bikes at Futaba Station.
Train tracks of Futaba Station.
Geisha doll peers out the window of an abandoned house in Futaba, Japan.
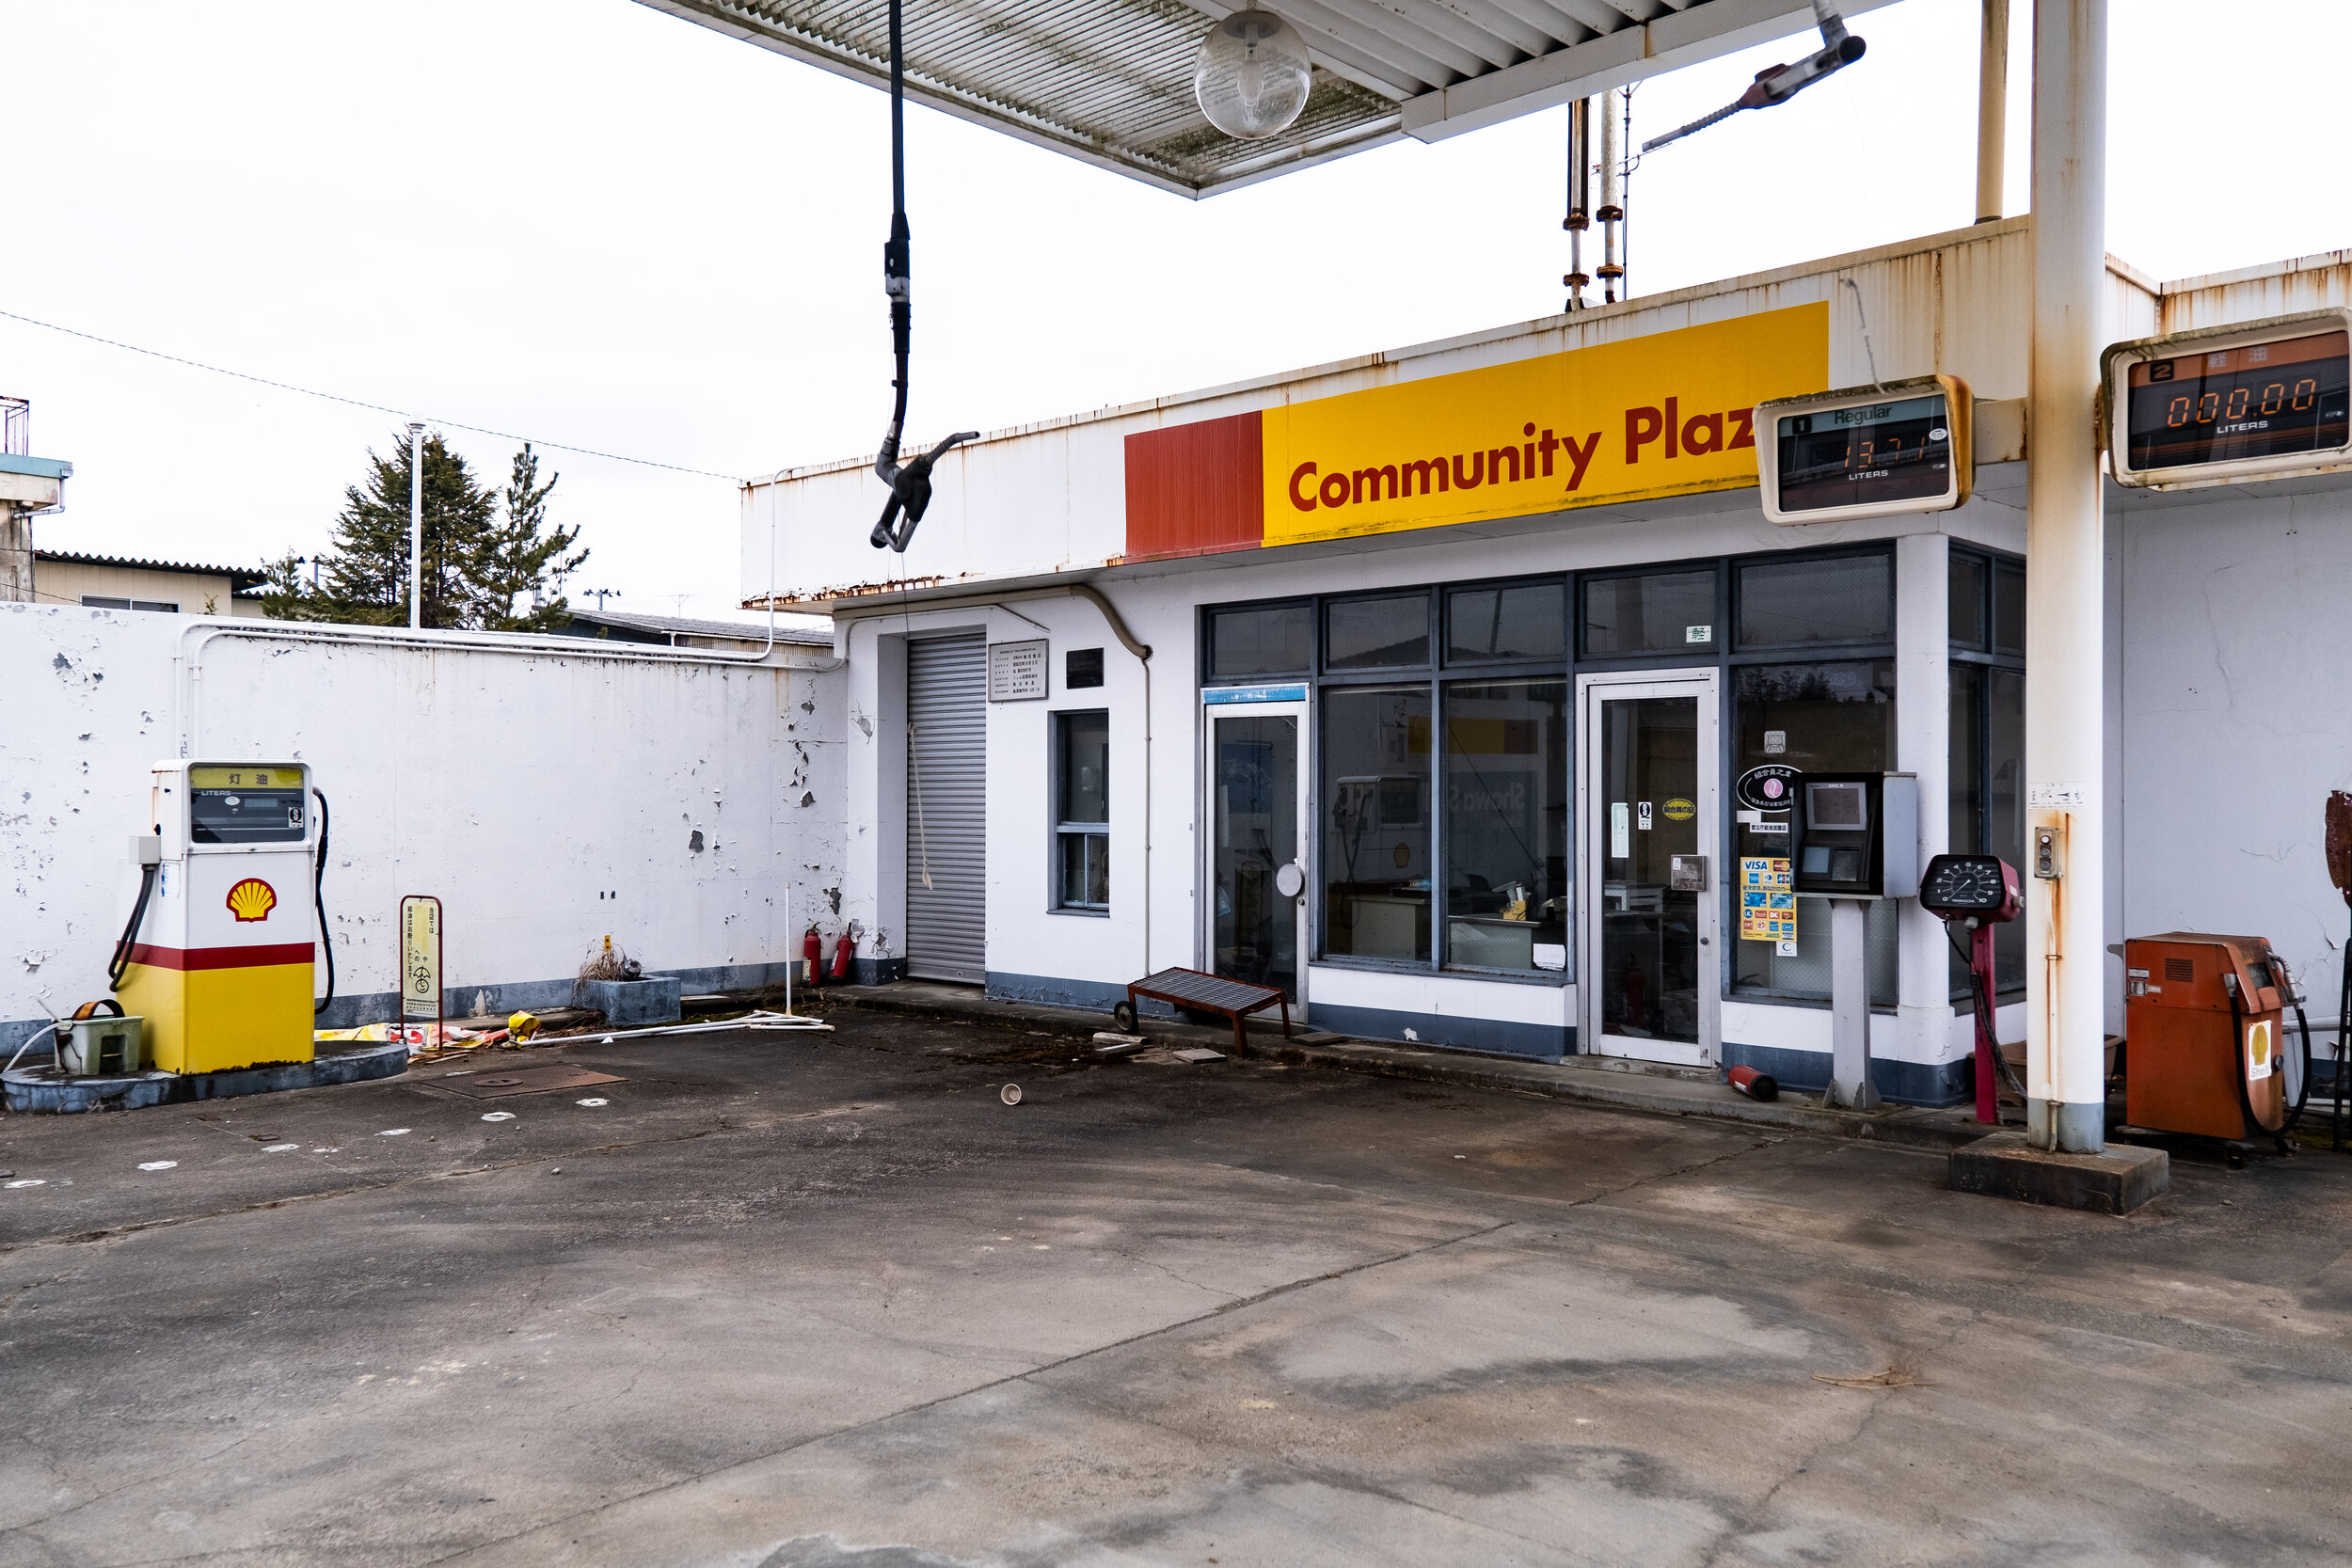
Shell petroleum station (Futaba, Japan)
The Aftermath
The aftermath of March 11th, 2011 is truly incalculable. The immediate humanitarian crisis resulted in over 340,000 displaced people in the Tōhoku region. Across Japan, 470,000 people were evacuated because of the tsunami destruction. Of these residents, 150,000 were temporarily or permanently relocated because of nuclear fallout. Hundreds of thousands of abandoned animals starved to death. Shortages of food, water, shelter, fuel, and medicine were widespread.
The physical destruction of the disasters left Tohoku’s coastal cities and towns with nearly 25 million tons of debris. In Ishinomaki alone, 17 trash collection sites measuring 180 m (590 ft) long and at least 3 m (15 ft) high took nearly three years to dispose of.
The economic impact would also be monumental. Most of the region’s industrial production was suspended and the local economy was crippled. But the longer-term cost of rebuilding is astronomical. Currently, the damage stands at ¥16.9 trillion JPY ($155.5 billion USD), a cost that will continue to rise for years to come.
Calm waters of the Kitakami River.
A Decade Later
A decade has passed since the Great East Japan Earthquake & Tsunami. Many of the damaged coastal cities have miraculously rebuilt and are beginning to prosper again. Sadly, other towns have simply vanished. Reconstruction efforts are on-going and measures are being taken to add additional security for residents who might be in future danger. Seawalls are under construction and many estuary banks have been reinforced by concrete. Moreover, numerous museums and memorials have opened so that civilians and governments alike can better understand the lessons learned from March 11, 2011.
While all residents of Tohoku’s coast are still fighting for normalcy, Fukushima Prefecture has a long road ahead. True, many of the affected areas of Fukushima have largely reconstructed. A massive emphasis has been placed on nuclear decontamination. In Futaba, for example, an army of industrial trucks line the roads on the outskirts around the town. The fleet, some 300,000 strong, transports bags filled with contaminated soil to storage and processing facilities along the coast. So far, 10.4 million cubic meters of radioactive topsoil have been removed by the 18 million workers contracted to cope with the task. Regardless of these efforts, many Fukushima residents are unable to return due to lingering radiation. Of the 470,000 evacuees, 41,000 residents are still displaced.
Despite the momentum in Japan’s Tohoku region, the reminders and lingering obstacles of March 11th, 2011 are too numerous to count. The impact of a single day, ten years later, continues to affect Japan and will continue to do so.
In an effort to inspire hope, a small area of Futuba, Japan has been turned into a make-shift art district.
Many of the damaged bridges straddling the Kitakami river have been repaired or rebuilt.
Masato Kusajima narrowly escaped the tsunami's impact. Behind, a sign exclaiming Ganbarou Ishinomaki (Japanese for “Let’s do our best, Ishinomaki” or “Let’s keep fighting”) can be seen.
Industry has returned in many coastal areas such as Ishinomaki, Japan.
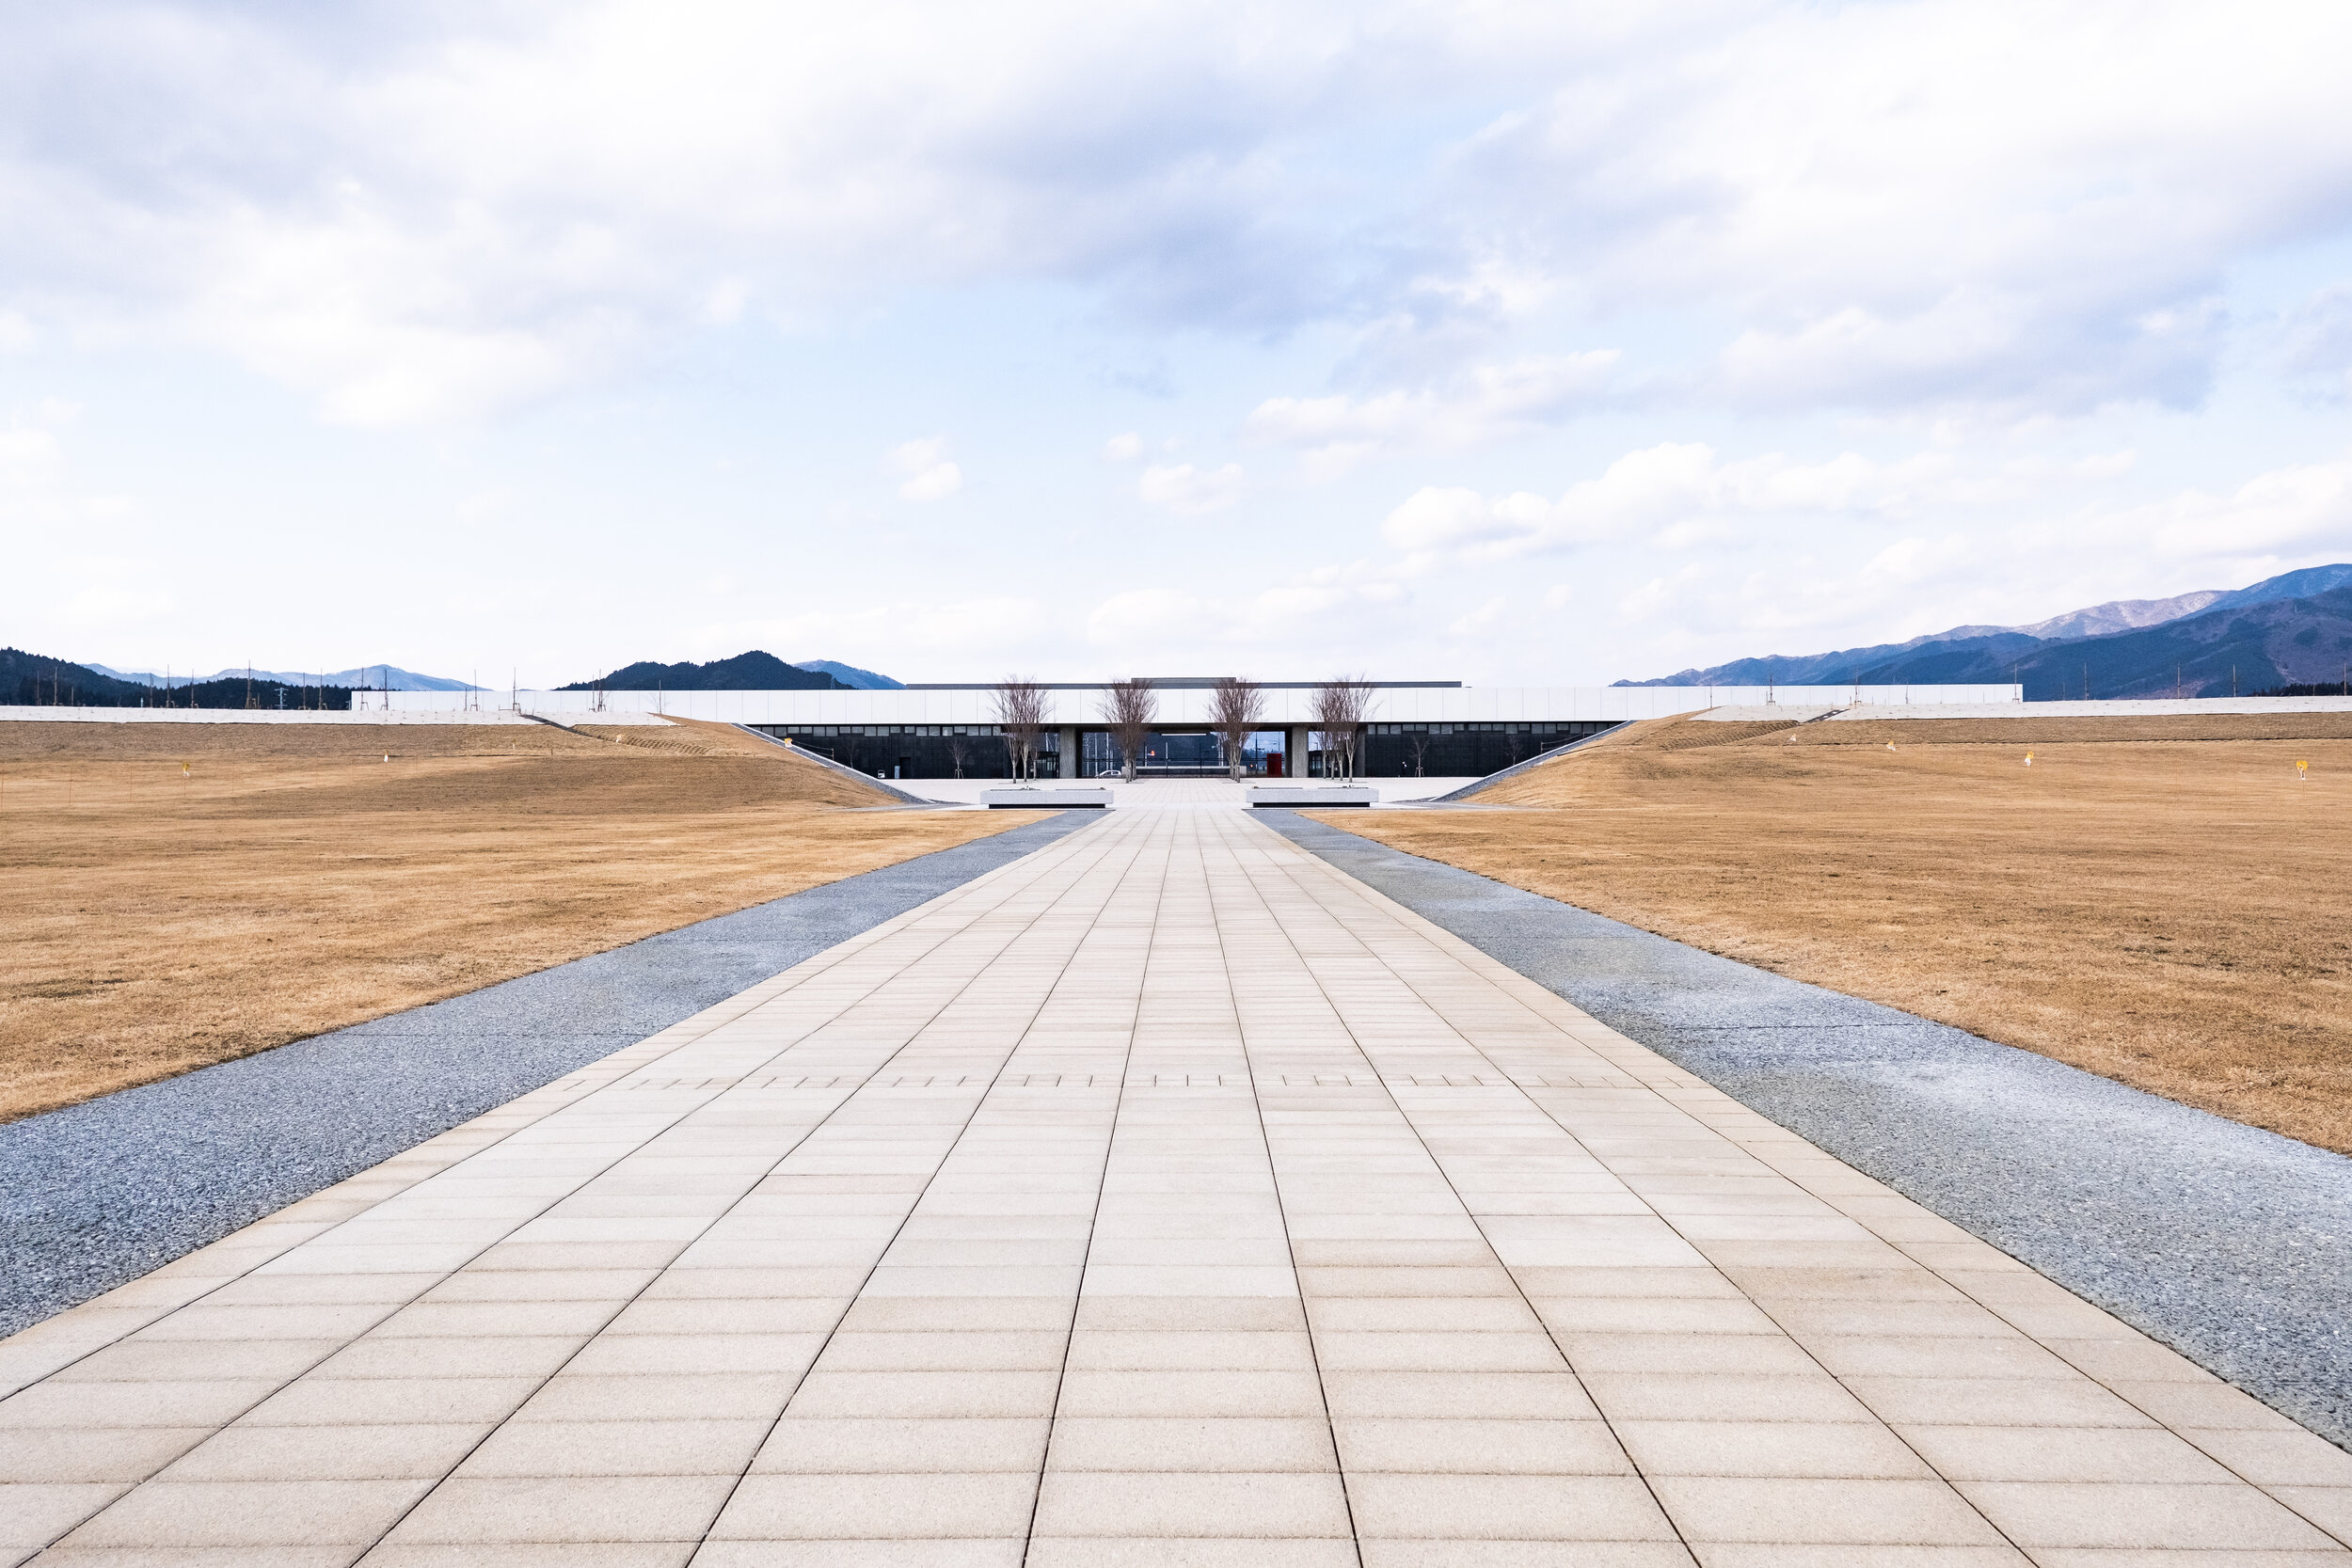
Opened in 2020, The Great East Japan Earthquake and Nuclear Disaster Memorial Museum is less than 2 miles from the Fukushima Daiichi nuclear plant.
Tree trunk charred by burning debris alit on tidal waves (Ishinomaki, Japan).
Ishinomaki has rebuilt much of its affected areas and looks to the future with hope.
The coastal plain of Rikuzentakata has been raised 10 meters. Additionally, a 2.5-meter-high, 2-kilometer long seawall has been constructed. However, designated tsunami evacuation sites are still kilometers away.
While few passengers have ever stepped on its platform, a newly built JR Futaba Station has opened.
Tadaatsu Sakamoto, a primary school principal and former school board member, has been committed to the reconstruction of Ishinomaki. At the time of the earthquake, Sakamoto was bound for Narita airport but immediately returned to Ishinomaki to be involved with recovery efforts.
The newly opened Iwate Tsunami Memorial Museum in Rikuzentakata, Japan.
Reconstruction of Iwate’s costal areas remains ongoing.
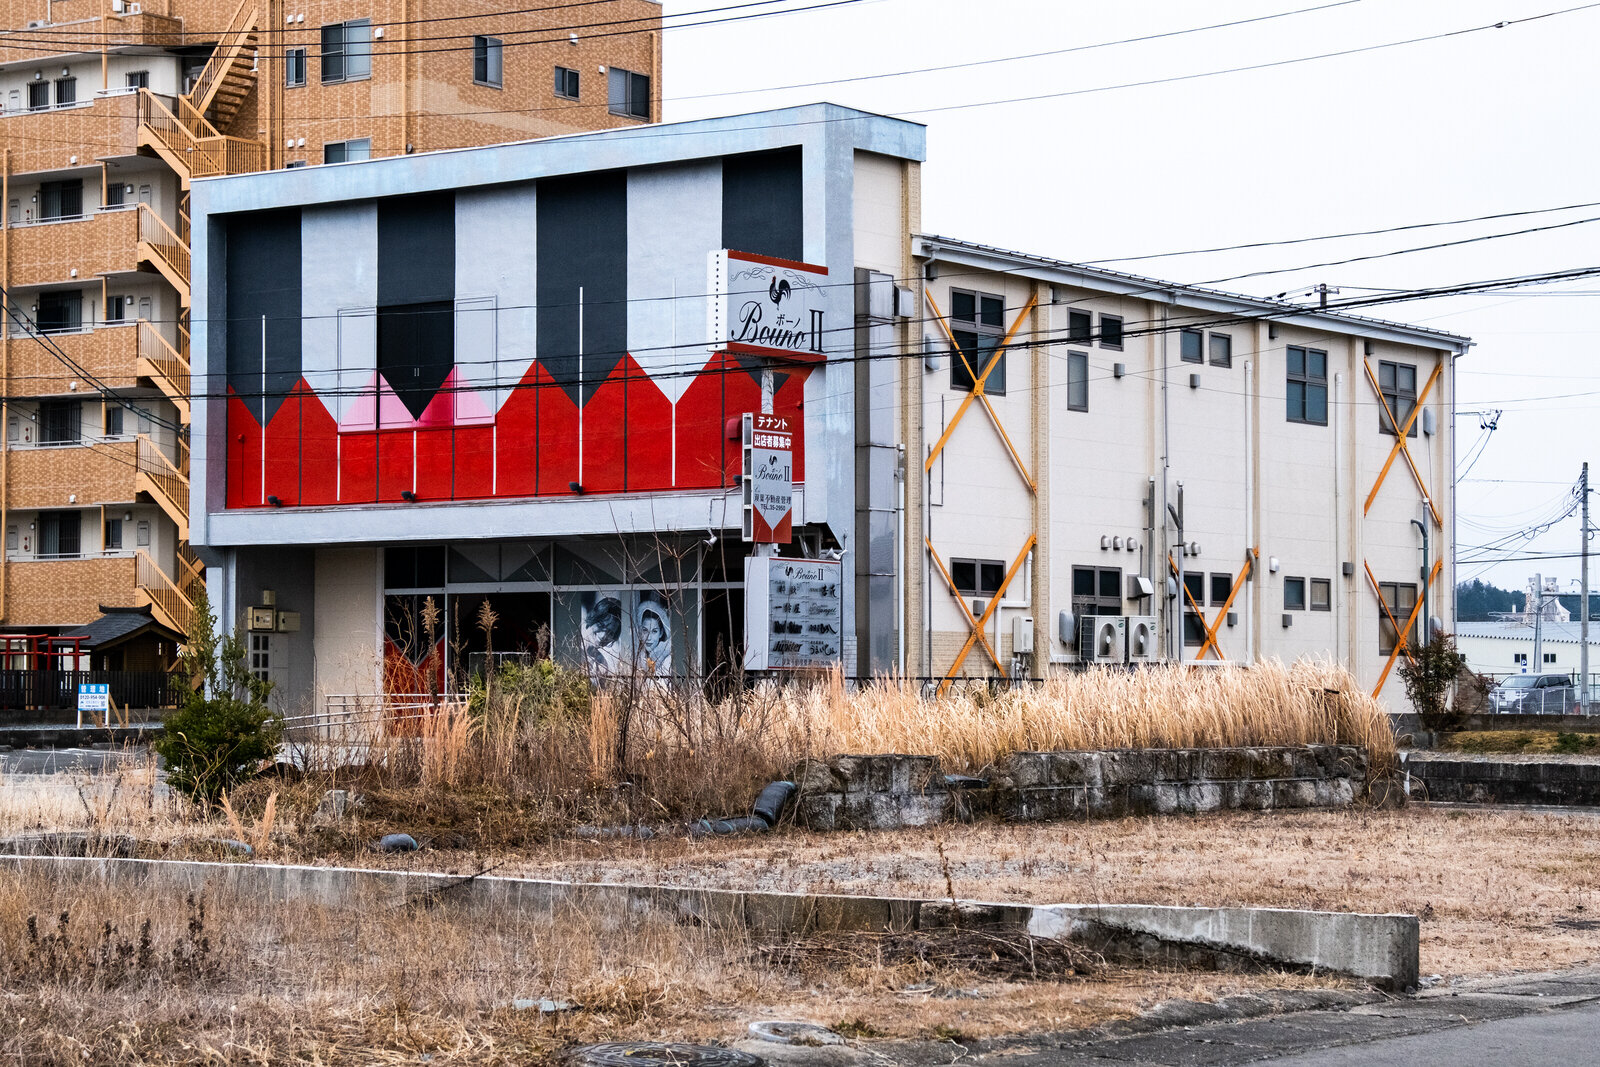
A derelict business in Namie, Japan which was evacuated shortly after the Fukushima Daiichi nuclear disaster.
A derelict office building in Ofunato, Japan. The markings of an American-led K9 search unit are still legible.
New hydroponic facilities are under construction in the hope of reigniting Fukushima’s agriculture industry.
Solar panels provide electricity for many homes and businesses in Iwate and Miyagi prefectures.
Fishing boats in Ryouri Bay, just north of Ofunato, Japan. Local fishermen have returned to the seas but report that yields are far less now than prior to the 2011 tsunami.
Workers continue construction on massive dams and seawalls throughout Iwate which will give residents extra moments to evacuate should another great tsunami occur. At present, more than 432 kilometers of seawall construction is underway (an equivalent distance from Tokyo to Kyoto).
Dubbed the “Miracle Pine,” this lone tree soon became a symbol of hope and recovery for the whole Tohoku region. Although this tree did eventually die from exposure to saltwater, it has been preserved as a permanent memorial in Rizentakata, Japan.
All work shot on assignment for the Swiss Energy Foundation (SES). The full report can be seen here.
More From Japan
Yanmar | Japan Corporate & Industrial Photographer
Photography is a powerful medium that has the ability to tell stories, evoke emotions, and capture the essence of a place. As a commercial photographer in Japan, I recently had the privilege of photographing Yanmar’s renowned agricultural manufacturing facility in Okayama, its central research facility in Maibara, and its corporate headquarters in Osaka.
Nestled in the picturesque landscape of Okayama, Yanmar’s agricultural manufacturing facility stands as a testament to the brand's commitment to excellence. As I stepped onto the factory floor, a symphony of precision machinery welcomed me. The hum of engines, the clanking of metal, and the meticulous movements of skilled technicians painted a vivid picture of the dedication and expertise that goes into manufacturing Yanmar's renowned products.
With my camera in hand, I embarked on capturing the heart of the factory. The assembly lines, bathed in industrial lighting, showcased the intricate process of building engines and machinery. Each photograph aimed to encapsulate the artistry and precision that define Yanmar's manufacturing techniques.
From the forging of raw materials to the meticulous assembly, I was enthralled by the seamless integration of human craftsmanship and advanced technology. The synchronized dance between the workers and the machinery became the centerpiece of my photographs, capturing the essence of Yanmar's commitment to innovation.
Beyond the factory walls, Yanmar's corporate headquarters in Osaka, Japan stands as a beacon of vision and inspiration. The architectural marvel, with its sleek lines and modern design, reflects the forward-thinking nature of the company. As I explored the interiors, I found myself immersed in an environment that fosters creativity and collaboration.
My lens gravitated toward the vibrant meeting rooms, where teams gathered to brainstorm, strategize, and exchange ideas that fuel Yanmar's endeavors. In addition to the workspaces, I had the opportunity to photograph the executives that lead Yanmar.
As a Japan-based photographer, receiving a commission from one of Japan’s corporate giants was a tremendous honor, I was grateful for the opportunity to translate Yanmar's story into a visual language that showcases the company’s success. The images not only highlight sophisticated machinery and advanced technology but also the human touch that underpins Yanmar's achievements. Through these images, we can see the beauty of innovation, the power of collaboration, and the relentless pursuit of excellence that defines Yanmar as a global leader in its field.
Scroll further to see the intricacies of Yanmar's innovative manufacturing processes and the dynamic spirit that drives its corporate culture.
More Commercial Photography
Itosho's Shojin Ryori | Editorial Food Photography
I arrived early for my appointment with Hiroharu Ito, the owner/chef of Itosho, a Michelin star restaurant tucked in the backstreets of Tokyo’s Azabujuban neighborhood. In Japan it is important to be on time, but not 30 minutes early. I decided to wait in a small parking lot across from the restaurant and watched a gentleman sweep the street with a traditional wooden broom.
Five minutes before my scheduled arrival time, I gently knocked on Itosho’s unassuming door. Unsurprisingly, I was greeted by the same man who had swept out front. He introduced himself as Chef Ito, who for the last 40 years has served shojin ryori (Buddhist temple cuisine) from his modest restaurant.
I entered and was impressed with both Ito-san’s warm greeting and the refined atmosphere. The interior of Itosho is delicate with a stillness, an undercurrent of calm. Wooden beams and pillars meet tatami mats. Shoji screens serve as partitions and a kakijiku scroll resides in a tokonoma alcove, perfectly reflecting an idyllic Japan.
Itosho’s modest interior
Chef Hiroharu Ito
Chef Ito led me to a small room where I would photograph some of his signature dishes for an upcoming editorial in American Way, American Airline’s inflight magazine. But before preparing his culinary delights to be photographed, he produced an aged paper tube and pulled out clippings from the New York Times and other domestic newspapers highlighting his restaurant. Ito-san said that he was happy to have me so that others might learn about his approach to cuisine and so that he could add another clipping to his modest collection.
When I finished photographing the sample of Ito-san’s creations, he invited me to relax and quietly enjoy the food he had prepared. From zensai appetizers to soba noodles topped grated yams, suimono soup with chestnut dango dumplings to nasu no mizore (deep-fried eggplant covered with a layer of grated daikon symbolizing winter snow), one doesn’t need to be a vegetarian to appreciate the intention of each dish. Chef Ito’s signature plate, shojin-age. consists of vegetable and tofu morsels frosted with mochi pebbles and deep-fried to perfection. Sprinkled with salt, the flavors are just as profound as the principles of shojin ryori. Miraculously, chef Ito manages to transfer the state of zen onto his customer’s palate.
I could feel chef Ito watching me eat through a slit between the sliding shoji doors. I turned my head ever so slightly and met his gaze. He smiled gently, slowly bowed, and left me to savor the inner calm that his prized cuisine inspires. I was enamored by the subtle flavors and understand why many think that Itosho is one of Tokyo’s best-kept secrets.
American Way Magazine Tearsheets
Double page opener featuring Itosho’s delicately prepared shiitake (Tokyo, Japan)
Itosho’s shojin-age frosted with mochi (left)
More Food Photography
Mount Fuji, Yamanashi Prefecture
Japan Photo Journal #3
Ferris Wheel Morning (Matsuyama, Japan)
Architecture (Tokyo, Japan)
Garden Reflection (Matsuyama, Japan)
Sunning (Shinjuku, Tokyo)
Paper Cranes (Kumamoto, Japan)
Stander (Kyoto, Japan)
Birds (Yamagata, Japan)
Courtyard (Koyasan, Japan)
Daizenji Temple (Koshu Valley, Japan)
Mount Yotei - Niseko, Japan
Temple Roof (Tokyo, Japan)
Sunrise (Shimoda, Japan)
Facade (Matsuyama, Japan)
Morning Rituals (Koyasan, Japan)
Kimono In Leaves (Kyoto, Japan)
Street Lines (Tokyo, Japan)


